
There are moments when you need to record what’s happening on your Mac’s screen for capturing online meetings, creating instructional content, or other purposes. Knowing how to capture both the visual and audio components effectively is essential. In my case I would like to record meetings and webinars I attend as a participant and not a host.
This guide will walk you through screen recording on your Mac, covering both the visual and auditory aspects. We’ll use the built-in functionalities of macOS Screenshot toolbar for straightforward recording tasks and introduce a third-party application, BlackHole, a virtual audio loopback driver that allows applications to pass audio to other applications with zero additional latency
Required tools and setup
MacOS Screenshot toolbar
MacOS offers a native screen recording tool that you might not be aware of. For users with iOS Mojave or later versions, a simple shortcut can activate the Screenshot Toolbar, allowing you to record your screen with audio effortlessly and without any additional cost.
It’s important to note that this feature only captures audio via the microphone and does not include internal audio sources like browser video sounds or audio from online meetings. For capturing internal audio, you would need to consider third-party solutions.
If recording with your voice-over is your goal, You do not need this next tool
BlackHole
From the Developers own description: “BlackHole is a modern macOS virtual audio loopback driver that allows applications to pass audio to other applications with zero additional latency.”
Install
See the Github page for complete Installation and uninstallation instructions
- If you have homebrew, then installation of the
64chversion (my recommendation) on MacOS is very easy:
brew install blackhole-64ch
Setup Loopback to record system audio
These steps walk through setting up a ‘Multi Output Device’. See the official guide here
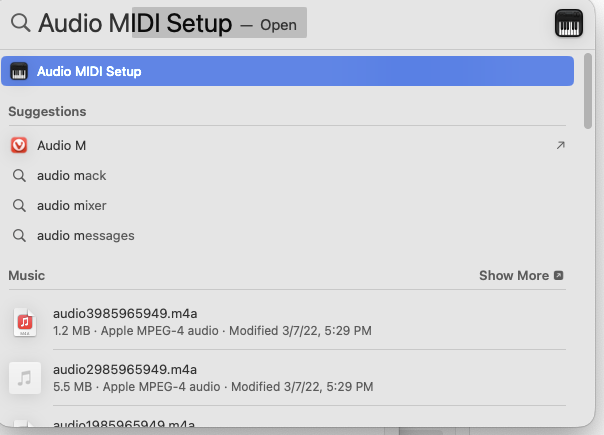
- Open Audio Midi Setup
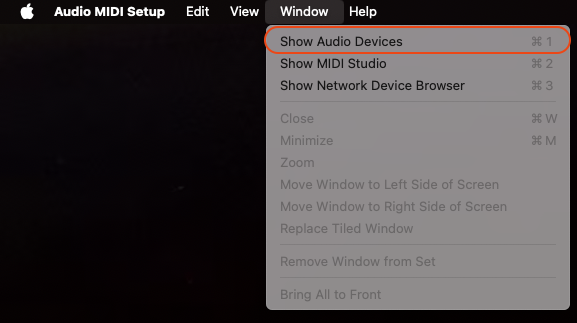
- Open Audio Devices Window. When you open Audio MIDI Setup, if the Audio Devices window does not appear, select
Audio Devicesfrom theWindowsdrop-down menu inAudio MIDI Setup.
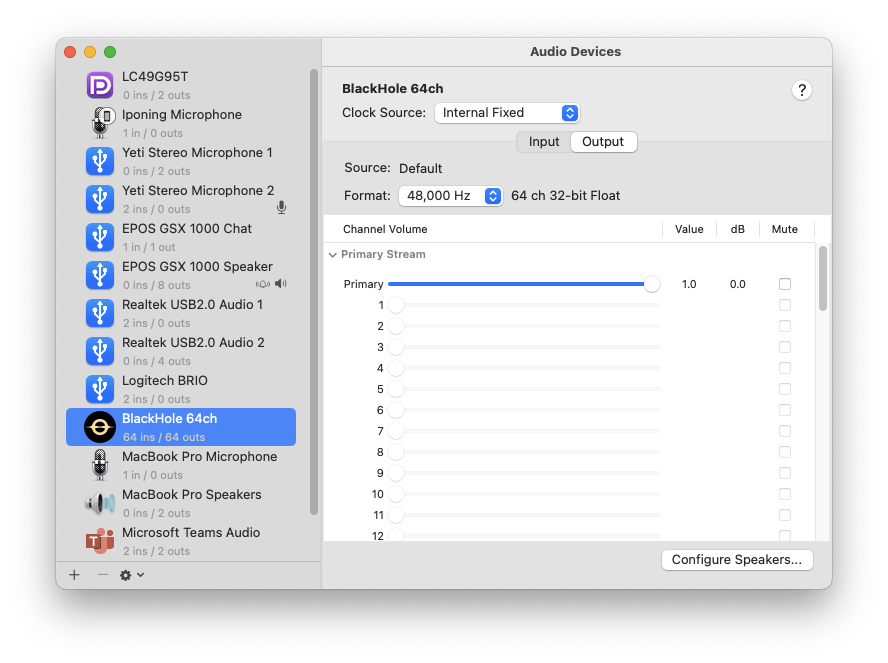
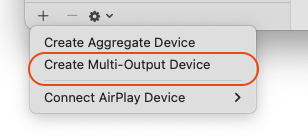
- Create Multi-Output Device. In the lower left hand corner of the
Audio Devicesclick the+icon. SelectCreate Multi-Output Device
-
Select Output Devices. In the Multi-Output device you just created, select the audio devices that you want to output audio. It is highly recommended that you enable ‘Drift Correction’ for all devices except the Clock Source device.
Note: that there are currently some issues with macOS that require you to enable and prioritize the Built-in Output (which may also be referred to as MacBook Pro Speakers or something similar) as the top device in the Multi-Output. If you find that BlackHole is listed first, simply uncheck and recheck the box under
Useto change the order. This should resolve the issue.
Below Is a Screenshot, taken from the the official guide, of a typical setup:

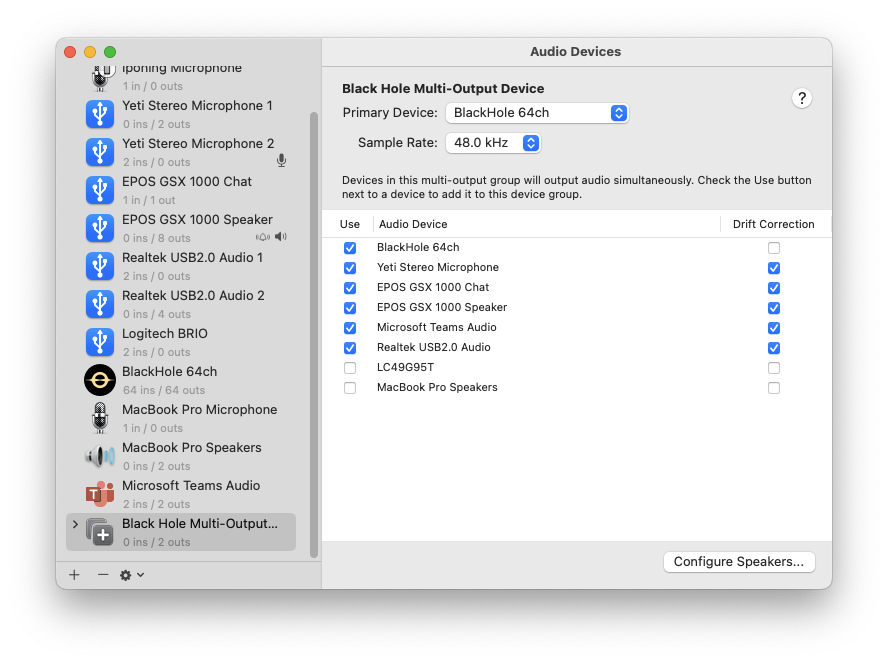
Below Is a Screenshot of my setup, where I have External Mic (Yeti Stereo Microphone) and External Sound card (EPOS GSX 1000 Speaker) - I did not need to check “Macbook Pro Speakers”:
Screen Recording on Mac with Audio Using the Screenshot Toolbar
With Blackhole setup in the last step we are ready to record screen with audio. Lets use Zoom as an example, where we can record the meeting as a participant without host permission
-
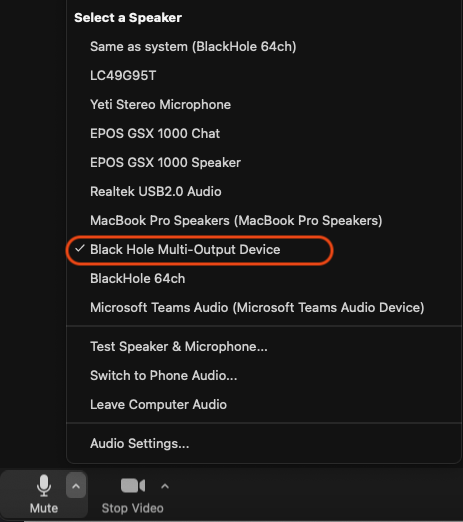
In Zoom: **Set your **Sound > Speaker settings to the newly created Multi-Output Device
- Activate the Screenshot Toolbar by pressing
Command + Shift + 5. -
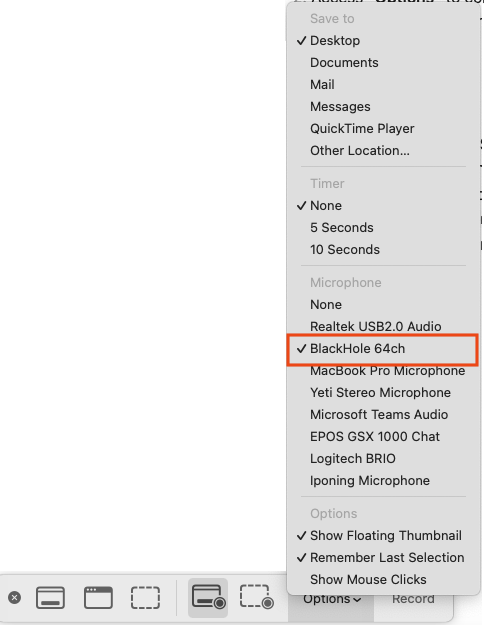
Access “Options” to configure your recording preferences, such as save location, countdown timer, and microphone settings.
- Opt for “Record Entire Screen” or “Record Selected Portion” to define your recording area, then start recording.
- The toolbar will vanish once recording begins. To stop, either click the Stop icon in the menu bar or use the
Command + Control + Escshortcut. - A thumbnail of the recording will briefly appear post-recording, offering options for saving, trimming, or sharing.